Saturday, November 26, 2011

Ice Queen


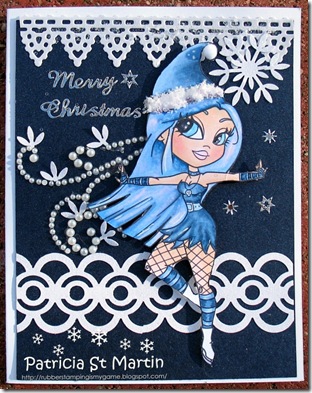
Ice Queen 2011 We have a new sponsor over at Color Me Creative for our challenge #32, It is Simply Betty Stamps. She has some adorable stamps at her site to choose from so if you get a chance stop by and check them out. The challenge for this time is Milti- Colored Hair/Non Traditional Hair Colors. My image is called Ice Skate Sally. You also can win a package of Cryogen cardstock.

Ice Queen 2011 close up first stocking
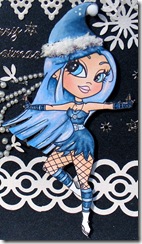
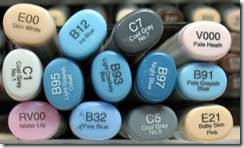
Here is a close up of my image and these are the copic markers I used. The paper I used is from Core’dinations by Darice navy pearl. Martha Steward punches Snowflake and Chain trim. Lace light deco border from CherryLynn designs. Pearls by Say it with Bling.
Thanks for stopping by. Have a nice week end.

Hugs, Patricia

Monday, November 21, 2011

Joy of Christmas

Joy of Christmas 2011


Hope everyone had a nice week end. Mine was very nice. Their was 8 of us all girls friends that got together on Sunday at 11:00am and we made Christmas card all day long, I did not get home until about 11:30pm we had a great time. It was a great day and had lots of fun.
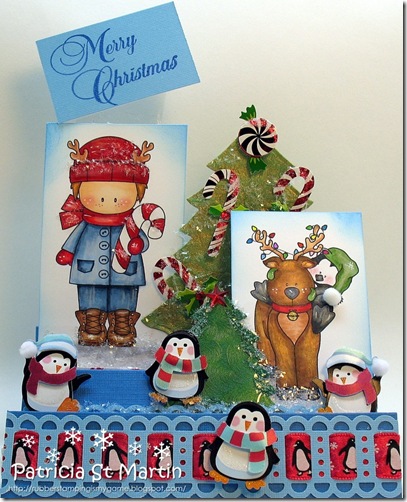
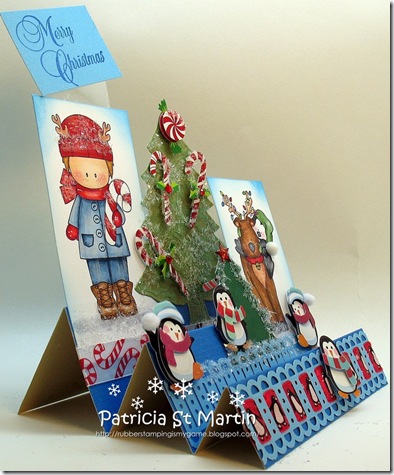
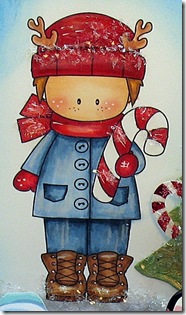
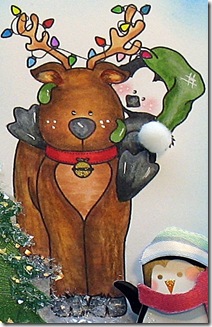
This is my card I made for the Card For Man challenge. I used Whimsie Doodles images called “reindeer range” and “deer friend”. The stamped sentiment “Merry Christmas” I used is from Rubbernecker. The challenge is FANCY FOLDS. I did for my card what is called “Stair Step Fold Card” and you can fine the tutorial here.


Start Date: 21 November 2011
End Date: 5 December 2011
Theme: Fancy Folds
Sponsor: Whimsy Doodles
website: http://www.whimsiedoodles.com/index.html
Logo:


Blurb: Whimsie Doodles is so excited to be sponsoring the new challenge! In March of 2009 Melyssa Connolly, artist and owner, began turning her whimsical hand-drawn images into digital files for sale online. Whimsie Doodles' digital stamp line features images that range from cute little boys and girls, to punny stuff, and everything in-between. We enjoy sharing lots of samples on our company blog, where we also post challenges and tutorials.
Prize: $10 gift certificate

Joy of Christmas side I cut out a couple of tree’s from my Spellbinder die cut. I was inspired by some of my stickers that I found and thought they are so perfect for this card. The Penguins and the candy canes are from Recollections Dimensional. Diamond Dust for some snow from Flora Craft. Punch is called Linked Trim from Martha Steward. I burnish the edges with Brilliance with Brilliance sky blue and stamped the sentiment with Brilliance Mediterranean Blue.


Joy od Christmas image Joy of Christmas penguin


I did color my images with copic markers. I also found some ribbon I had that had some Penguins on it so I woven it in and out on the punched linked trim and that is how it turned out (Not sure if I said that right).


Have a super week.


Hugs, Patricia

Thursday, November 17, 2011

Cold Outside

Cold outside 2011 folded We have started our weekly challenge at The Outlawz Twisted Thursday Challenge and for the week it all about Shapes and Snowflakes. Remember for this challenge you can use prisma pencils and/or other mediums of your choice including alcohol ink markers such as Copics and Promarker. However there is a twist, you are only allowed to have 50 percent alcohol inks on your images.
Other mediums can be anything from dye inks, distress inks, chalks, heat embossing, water colored pencils, crayons, etc. Prisma's can be ANY colored pencil, it doesn't have to be the Prisma color brand. This week we would like you to create a different shaped card (no standard 4.5 x 5.5 sized cards). AND for a twist we want you to include at least one snowflake on your project. Challenge ends on November 23.


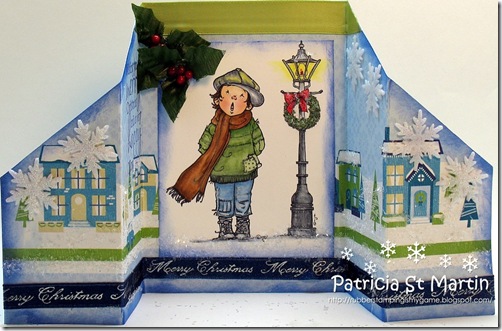
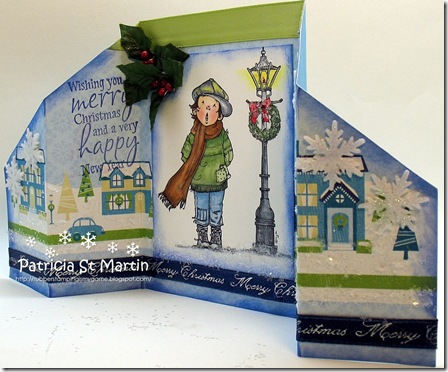
Cold outside 2011  side Now for my card I really do not know of their is a name for my card. I have been calling it a stand up card. I do not know where I got the pattern but it is very simple. My two images are from Mo Manning and they are called Christmas Lamp and Charlie Caroling. The paper I used is from Die Cuts with a View. Sentiment stamp is from Great Impressions. Snowflakes are from the trim a tree sections of Hobby Lobby.


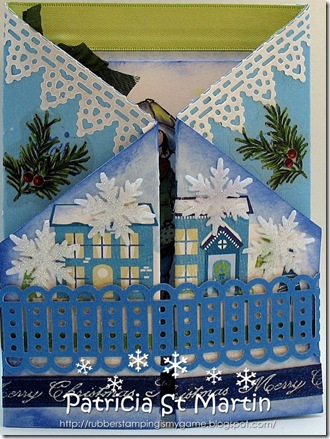
Cold outside 2011 closed This is how I close the card up. I punched out a band with Martha Steward punch and slide it up the bottom so it holds the card closed. When the card is closed the size is 6.50 X 4.25. I hope you join us at Twisted Thursday over at the Outlawz. Have a wonderful week end.


Mo Manning- Challenge #109 Winter ends Nov 22


Hugs, Patricia

Monday, November 14, 2011

Harmony

Harmony 2011

Happy Tuesday to everyone! The last several days here in Wisconsin have been wonderful. I’m still watching the birds in my back yard, I do feed then all year long. I enjoy then so much. It is time for the challenge at Color Me Creative challenge #31, We are doing “THE COLORS OF THE SEA” .Your challenge this time is all about colors associate with the ocean, its marine-life, shells and mermaids! You may use any image you like but you must use colors of the sea to color it with your copics.
The Prize for the winner of this challenge (randomly chosen) will get:
Our Sponsor is Michelle Perkett.

**Prize from our sponsor Michelle Perkett Studio TBA!!
**1 pack of Cryogen Cardstock

The challenge ends on November 25th at 6:00pm.

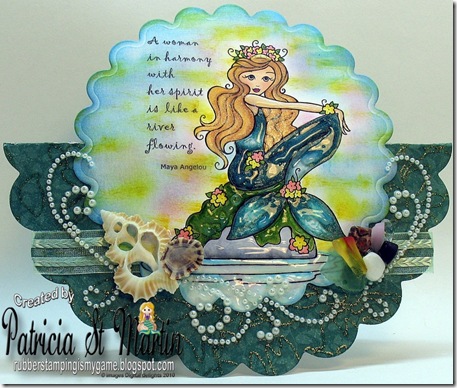
 I used my Spellbinder Grand Scalloped Circle and cut out two of the circles. The largest one I folded in half. I used my Grand Calibur to cut then both out. That was one of the easiest card I ever made.


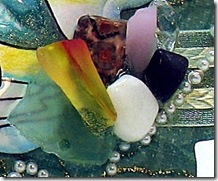
Harmony schells Harmony rocks

Harmony 2011 side


Harmony up close

Supplies:
Stamps:
Digital stamp called Harmony (Michele Perkett)
Paper:
Heavy scrapbook paper (Die Cuts With a View)
Classic Crest Smooth solar white (Neenah)
Ink:
Copic Markers (.Too corp.)
Smooch Gold Lame (Clearsnap Holding) Made in USA
Shimmerz Aqua Marine (Clearsnap Holding)
Twinkling H2* shimmering water colors Gold Glimmer (LuminArte)
Brilliance inks Sky Blue, Yellow, Violet (Tsukineko)
Other:
Pearls (Say it with Bling)
Ribbon (stash)
Rocks (stash)
Shells (stash)
Paper Cutter
Diamond Glaze (Judi Kinz)
Grand  Calibur die cut machine
Spellbinder Grand Scalloped Circles

I hope you enjoyed my card. We would love for you to join us at Color Me Creative. Have a wonderful week.

Hug, Patricia

Monday, November 7, 2011

Oh! Christmas Tree

Oh! Christmas Tree.


Our challenge #23 at Cards For Men is “It’s Nearly Christmas”. Our Sponsor is Karens Doodles and the image I used is called “Noel”.
I made a Easel card out of my Grand Nestabilities label #23. Martha Steward Bangle chain punch. For my flowers I used medium 6 petal punch, small 6 petal punch, ash leaf punch all from punch a bunch. Viva pearl pen color red. Stickles glitter glue color star dust. The sentiment is from The Angel Company. Paper is from Peppermint Forest stack 12 x 12 from Joann's.Burnished around the edged with Brilliance sky blue ink.

Start Date: 7 November 2011
End Date: 20 November 2011
Theme: It's nearly Christmas
Sponsor: Karen's Doodles
website: http://www.karensdoodles.com/
Logo:


Blurb:


Karen Johnson has been drawing all of her life. She has worked on the feature film, “Ferngully The Last Rainforest” and has created animations for Disney, Fisher Price and Mattel. She has illustrated several children’s books and is currently teaching animation at a college in Wisconsin. She started Karen’s Doodles so she could share her whimsical drawings with crafters from around the world.


Prize: 3 Digital Images

I have no idea why I did not take a close up picture of the birds singing but I did not. I do hope you enjoy my card. We would love to have you join us at Card for Men. Thanks for stopping by. Have a wonderful week.


All that Scraps- Anything


Hugs, Patricia

Friday, November 4, 2011

A Origami Christmas Tree Tutorial

Merry Christmas
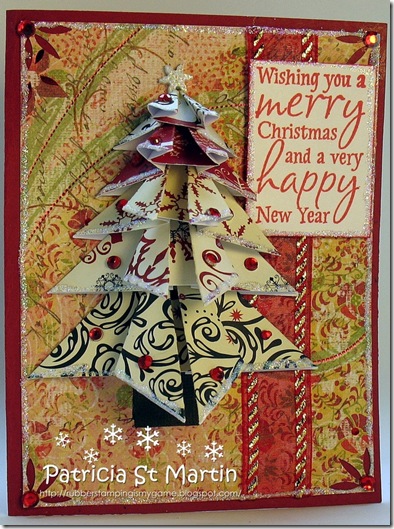
Before I get into the tutorial I made this card for The Outlawz Twisted Thursday Challenge that started yesterday. The challenge is FANCY FOLDS, it ends next Wednesday November 9th so if you can join us we would love to see your card. Some crafters may not know what origami means so I’m going to tell you, The Japanese art of folding paper to form flowers, animals, ect.
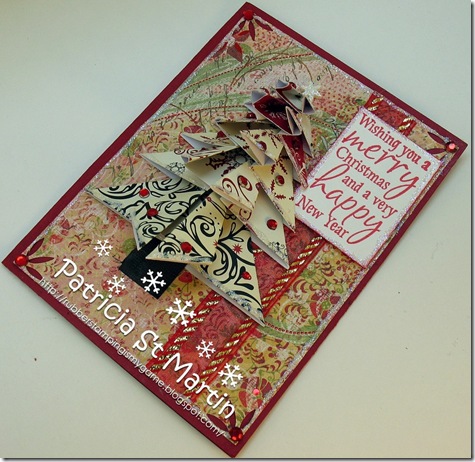
Merry Christmas flat
Here is a view with my card laying down.
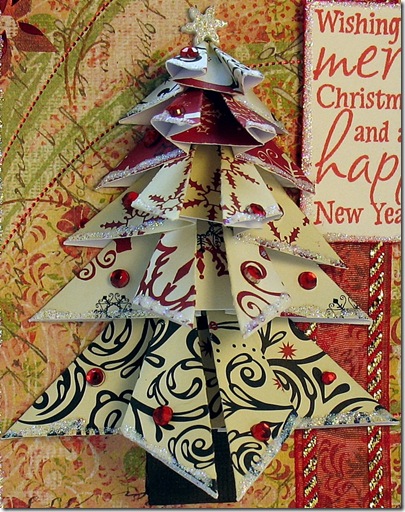
Merry Christmas tree
Here is a close up of the tree. So I do hope these help for reference if you need to look at something. I have broken it down for each step.
The paper sizes, for 1 tree you only need to cut one of each square, starting from the bottom 3.5” x 3.5”,  3” x 3”,  2.5” x 2.5”, 2” x 2”, 1.5” x 1.5”, 1” x 1”.
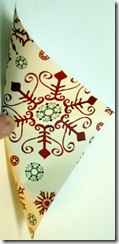
1 2 3
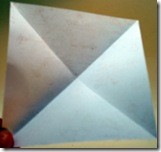
 4 At this point you have folded your paper in quarters.
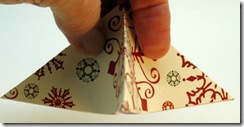
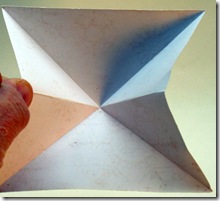
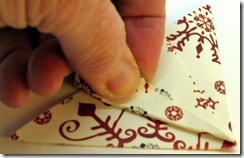
 5 This is the one that is a little tricky and it was hard to take a picture it only one hand. You need to use two hands and push in on the middle, I hope you can see that I’m doing that
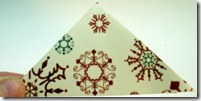
6 7
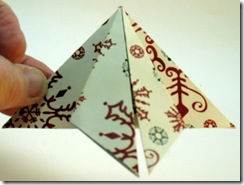
until you have a triangle, you want to make sure all the folds match and when you open the paper it will look like the one on the right.
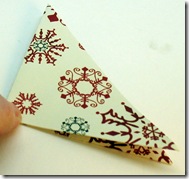
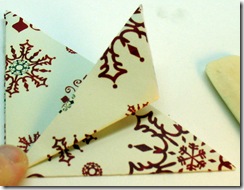
8 9
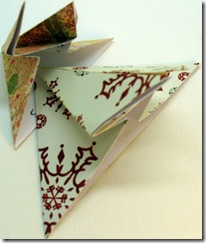
 10 Putting you finger at the tip and fold the one side into the middle then turn and fold the other side into the the middle so the match.
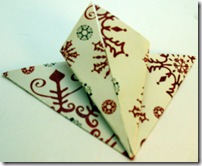
 11 12

1415
  This is the finish bottom layer.   
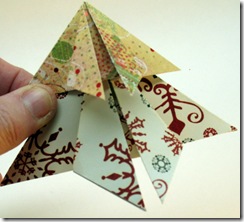
Here I want to show you the placement of the finish layers. You always add the layers under the layer above. So just add a little glue to the top of the bottom tree and insert the tree. Do not glue any other parts of the tree down as you want the tree to be full. You can now glue or tape your tree to your card.
You can make your tree with solid card stock and decorate it with all kinds of small things. Use different patterns or just use one pattern. It is your tree lets see what you can do with it.
Thanks for joining me. Let me know if you make one, I would love to see what you do with your tree. I hope this has helped you if you try one. Any questions let me know and I will help.
Hugs, Patricia